Tired of a flat upper chest? Learn the 7 incline dumbbell press tips that build mass, protect your shoulders, and fix common form mistakes. No fluff, just results.”
If you want that chiseled, powerful upper chest that looks great in a t-shirt from New York to London, the Incline Dumbbell Bench Press is your secret weapon.
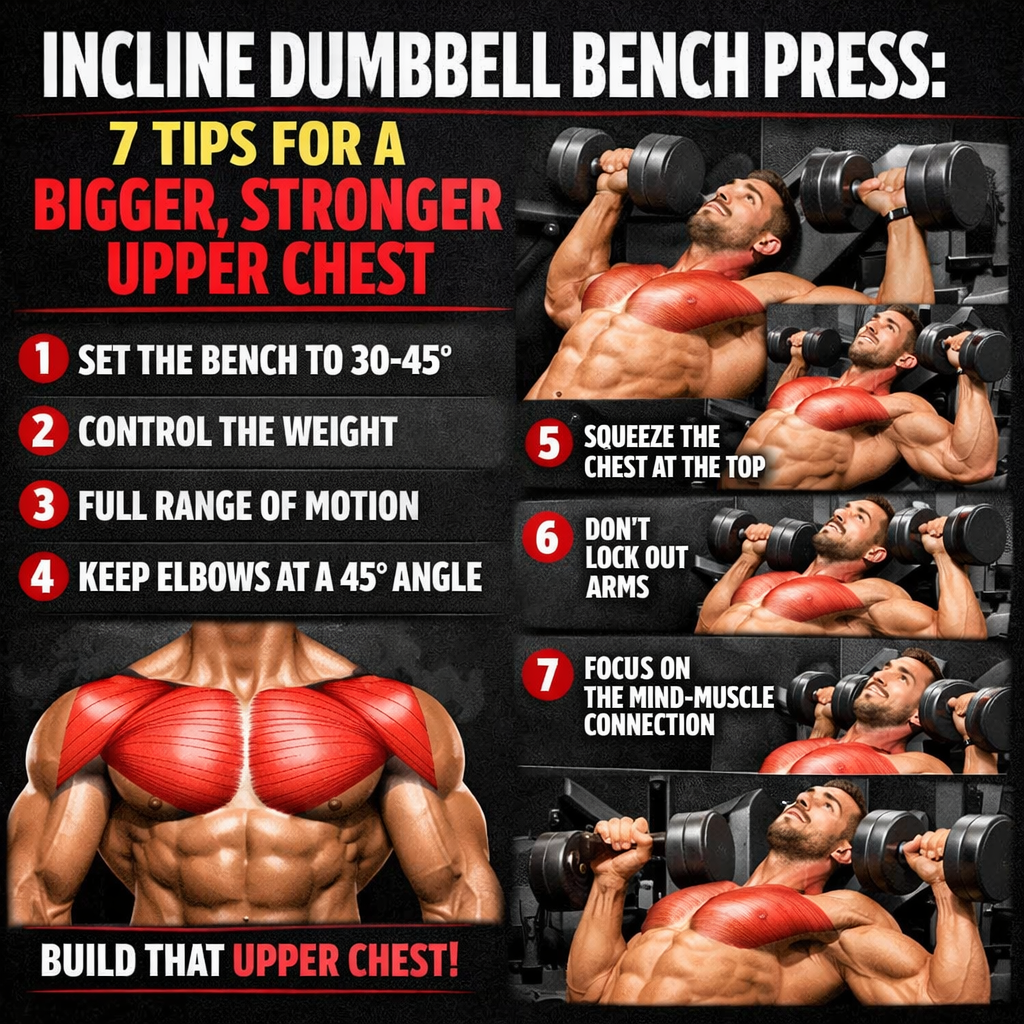
🏋️ Incline Dumbbell Bench Press: 7 Tips for a Bigger, Stronger Upper Chest
The incline dumbbell bench press is the ultimate upper chest builder. But most people do it wrong. These 7 tips will transform your technique—building a fuller, stronger chest while protecting your shoulders.
📖 Table of Contents
⚡ Quick Summary – 7 Pro Tips
- 1. Set bench to 30-45° – higher hits shoulders, lower hits mid-chest
- 2. Retract shoulder blades – protects shoulders, engages chest
- 3. Keep elbows at 45° – saves rotator cuffs
- 4. Lower dumbbells to lower chest – not collarbone
- 5. Full range of motion – stretch at bottom, press to top
- 6. Squeeze at the top – don’t lock elbows violently
- 7. Control the negative – 2-3 seconds down
Why Incline Dumbbell Press?
The flat bench press builds overall chest mass, but it neglects your upper chest (clavicular head of the pectoralis major). The incline press specifically targets this area, creating a full, balanced chest that looks impressive from every angle.
Muscles Worked
- Upper Chest (Clavicular Pectoralis): Primary mover – builds the “shelf” above your sternum
- Anterior Deltoid (Front Shoulder): Assists significantly – why incline hits shoulders more than flat
- Triceps: Lock out the movement
- Serratus Anterior: Stabilizes shoulder blades
How to Perform the Incline Dumbbell Bench Press (Step-by-Step)
- Set the bench: Adjust to 30-45 degrees. Never go above 60° – that becomes a shoulder press.
- Sit down: Place dumbbells on your thighs, then kick them up to shoulder height one at a time.
- Lie back: Keep your shoulder blades pulled together and down throughout.
- Press: Drive the dumbbells up in a slight arc, ending directly above your lower chest.
- Lower: Control the descent, bringing dumbbells to the sides of your lower chest.
- Repeat: Perform 8-12 reps with strict form.
Tip 1: Set Bench to 30-45 Degrees
1 Optimal Incline Angle: 30-45°
Why it works: Research shows 30-45° maximizes upper chest activation while minimizing front delt involvement. Angles above 60° turn the movement into a shoulder press, missing your chest entirely.
How to implement: Most adjustable benches have marked angles. Set it to the second or third notch – not the highest. If you feel it mostly in your shoulders, lower the angle.
Tip 2: Retract Your Shoulder Blades
2 Pull Shoulder Blades Together & Down
Why it works: Retraction stabilizes your shoulders, protects your rotator cuffs, and puts your chest in a stronger mechanical position. Without it, your front delts take over.
How to implement: Before unracking, squeeze your shoulder blades together like you’re holding a pencil between them. Hold this position through every rep.
Tip 3: Keep Elbows at 45 Degrees
3 Elbows at 45° – Not Flared, Not Tucked
Why it works: Flaring elbows (90°) stresses your shoulder capsule and rotator cuff. Tucking elbows (0°) shifts tension to triceps. 45° is the sweet spot for chest activation and shoulder safety.
How to implement: At the bottom of the movement, your elbows should form about a 45° angle relative to your torso – halfway between straight out and straight down.
Tip 4: Lower Dumbbells to Lower Chest
4 Touch Dumbbells to Lower Chest (Not Collarbone)
Why it works: Lowering to your collarbone puts excessive stress on your shoulder joint. Lowering to your lower chest (nipple line) keeps tension on your pecs and protects your shoulders.
How to implement: At the bottom, the dumbbells should be just outside your armpits, aligned with your lower chest. Your forearms should be vertical when viewed from the side.
Tip 5: Use Full Range of Motion
5 Deep Stretch at Bottom, Full Lockout at Top
Why it works: Partial reps rob you of gains. The stretch at the bottom is where muscle growth is stimulated. The lockout fully contracts the chest.
How to implement: Lower until the dumbbells lightly touch your chest (if shoulder mobility allows). Press until your elbows are straight but not locked. Never bounce out of the bottom.
Tip 6: Squeeze at the Top
6 Squeeze Your Chest at the Top – Don’t Lock Elbows Violently
Why it works: A hard lockout transfers tension from your chest to your elbow joint. A controlled squeeze keeps tension on your pecs, building more muscle with less joint stress.
How to implement: At the top, pause for 1 second and actively squeeze your chest together. Keep a slight bend in your elbows – never hyperextend.
Tip 7: Control the Negative
7 Lower Slowly (2-3 Seconds), Press Explosively
Why it works: The eccentric (lowering) phase causes the most muscle damage and growth. Dropping the weight robs you of gains and increases injury risk.
How to implement: Take 2-3 seconds to lower the dumbbells. Then press them up with controlled explosion. If you can’t control the descent, the weight is too heavy.
Incline vs Flat vs Decline: Which Builds the Best Chest?
| Exercise | Primary Target | Shoulder Stress | Best For |
|---|---|---|---|
| Incline DB Press | Upper Chest | Moderate | Filling out the “shelf” above sternum |
| Flat DB Press | Mid Chest | Low | Overall chest mass and strength |
| Decline DB Press | Lower Chest | Lowest | Rounding out the bottom of the chest |
The verdict: Use all three for complete chest development. But if you want an upper chest that pops, incline should be your priority.
❓ Frequently Asked Questions
This article contains affiliate links. I may earn a commission at no extra cost to you. Always warm up properly and consult a trainer before beginning a new exercise routine.
While the flat bench press builds overall mass, the incline variation specifically targets the often-stubborn clavicular head of the pectoralis major—the upper portion of your chest. For lifters across the US, UK, and Canada looking to fill out that top part of their chest, this exercise is non-negotiable.
Using dumbbells instead of a barbell offers a superior range of motion and helps fix muscle imbalances. This guide will teach you exactly how to master the incline dumbbell press for maximum growth and safety.
What is the Incline Dumbbell Bench Press?
The incline dumbbell bench press is a compound chest exercise performed on a bench set to an incline (typically 30-45 degrees). You press two dumbbells from the sides of your chest to full extension overhead.
Unlike a barbell, dumbbells allow each arm to move independently, forcing stabilizer muscles to engage and ensuring both sides of your chest do equal work.
Muscles Worked: What Are You Targeting?
Understanding the muscle involvement helps you perform the exercise with better focus and results.
Primary Muscles
- Upper Pectoralis Major (Upper Chest): The primary target. The incline angle shifts the emphasis from the mid-chest to the clavicular head.
- Anterior Deltoids (Front Shoulders): These assist significantly in the pressing motion, especially as the incline angle increases.
Secondary Muscles
- Triceps Brachii: Responsible for extending the elbow at the top of the movement.
- Serratus Anterior: The “boxer’s muscles” on your ribs, which activate during the pressing motion.
7 Pro Tips for a Bigger, Safer Upper Chest
To transform your upper chest and stay injury-free, implement these seven expert tips.
1. Master the 45-Degree Rule
The bench angle is critical.
Why Angle Matters
- 30-45 degrees: The sweet spot for upper chest activation. This angle targets the upper pecs while minimizing excessive front delt involvement.
- Above 45 degrees: Becomes a shoulder-dominant exercise. You’ll still work chest, but your front delts take over.
- Below 30 degrees: Too close to a flat press; you lose the upper chest emphasis.
Pro Tip: Set the bench to 30-45 degrees. If you feel it mostly in your shoulders, lower the angle slightly.
2. Set Your Shoulder Blades
Before you even touch the dumbbells, set your scapula.
Pinch your shoulder blades together and drive them into the bench. This creates a stable platform, protects your rotator cuffs, and ensures your chest does the work. Keep them retracted throughout the entire set.
3. Control the Descent (The Stretch)
Lower the dumbbells with control until they hover just outside your chest.
The “Touch-and-Go” Mistake
Don’t bounce the weights off your chest. Lower slowly (2-3 seconds), feeling a deep stretch in your upper pecs. This eccentric phase is where muscle fibers tear and rebuild, leading to growth.
4. Don’t Flare Your Elbows
Elbows pointed straight out (90 degrees to your torso) places immense stress on your shoulder joints.
Keep your elbows at roughly a 45-degree angle to your body. Imagine tucking them slightly toward your torso. This is safer and keeps tension on the chest rather than the shoulders.
5. Squeeze at the Top (But Don’t Lock)
At the top of the movement, squeeze your chest muscles together for a full second.
However, avoid slamming your elbows into a locked straight position. Keep a soft bend in your elbows to maintain tension on the pecs and protect your joints.
6. Use a Pronated Grip
Your palms should face forward (away from you) throughout the movement.
This “pronated” grip naturally positions your elbows correctly and allows for a better mind-muscle connection with the upper chest compared to a neutral (palms facing) grip.
7. Create an Arc, Not a Straight Line
Don’t press the dumbbells straight up like a robot.
Press them in a slight arc, bringing them together at the top. Imagine you are hugging a large barrel as you press. This follows the natural path of your shoulders and maximizes chest contraction.
Common Mistakes That Kill Upper Chest Gains
Even experienced lifters fall into these traps. Avoid them to maximize growth.
Mistake 1: Using a Flat Bench Mentality
Treating incline press like flat press is a common error. On flat bench, you drive through your heels. On incline, your feet are planted, but your upper back and glutes are the anchors. Stay pinned to the bench.
Mistake 2: Lowering the Weights Too Low
Dropping the dumbbells to nipple level (like a flat press) is incorrect. For incline, the dumbbells should brush the upper portion of your chest, near your collarbones. This maintains tension on the target muscle.
Mistake 3: Ego Lifting
Using dumbbells that are too heavy is the fastest way to injury.
- You’ll recruit momentum
- You’ll lose your retracted scapula
- You’ll likely drop the weights dangerously
Leave the ego at the door. Control is king.
Incline Dumbbell vs. Barbell: Which is Better?
This is a common debate. Here is the breakdown for the US/UK/Canadian market:
| Feature | Incline Dumbbell Press | Incline Barbell Press |
|---|---|---|
| Range of Motion | Longer; allows deeper stretch at bottom and better contraction at top. | Shorter; fixed path limits natural movement. |
| Muscle Balance | Corrects imbalances; each arm works independently. | Strong side can compensate for weak side. |
| Stability | Requires more stabilizer muscles; harder to control. | More stable; can usually lift heavier weight. |
| Safety | Safer if you fail; can drop dumbbells to sides. | Riskier without a spotter; can get pinned. |
| Best For | Hypertrophy, shaping, fixing imbalances. | Pure strength, overloading with maximum weight. |
The Verdict: For most lifters focused on building an aesthetic upper chest, dumbbells are superior. The increased range of motion and ability to correct imbalances makes them the top choice.
Programming the Incline Dumbbell Press
How often should you do this exercise?
Sets and Reps
- For Hypertrophy (Muscle Growth): 3-4 sets of 8-12 reps. This rep range optimizes time under tension and blood flow to the upper chest.
- For Strength: 4-5 sets of 5-8 reps with heavier weight.
When to Do It
Perform incline presses early in your chest workout, right after any flat pressing if you do both. Your upper chest responds well to focused work when your central nervous system is fresh.
Aim to train your chest once or twice per week, allowing 48-72 hours for recovery between sessions.
Optimize Your Physique: Track Your Progress
Building a stronger upper chest with the Incline Dumbbell Bench Press is a powerful goal. However, to truly see that definition and measure your body transformation, you need to align your training with the right nutrition.
Understanding your daily caloric needs ensures you’re either fueling for muscle growth or creating the right deficit to reveal the muscle definition you’re building.
👉 Use Our Free Weight Loss & Fitness Calculator
This smart tool uses the scientific Mifflin-St Jeor equation to calculate your Basal Metabolic Rate (BMR) and Total Daily Energy Expenditure (TDEE). It provides a personalized daily calorie target and estimates your timeline to your goal. Don’t leave your results to chance—track your progress and fuel those chest workouts effectively.
Is incline dumbbell press better than flat?
It depends on your goal. Flat press builds overall chest mass, while incline press specifically targets the upper chest. For a complete chest, include both.
What angle is best for incline dumbbell press?
Research suggests 30-45 degrees is optimal for upper chest activation. Above 45 degrees shifts the emphasis to your front delts.
Should I go heavy on incline dumbbell press?
Yes, but within reason. Use a weight that allows you to complete 8-12 reps with perfect form. Heavier weights (5-8 reps) can be used in strength phases, but never sacrifice control.
Why do I feel incline press in my shoulders?
This usually happens because:
- The bench is too upright (over 45 degrees).
- Your elbows are flared out too wide.
- You aren’t retracting your scapula.
Lower the angle slightly and tuck your elbows.
- 💧 Support Recovery with a Daily Detox – Intense training creates metabolic waste. Gentle daily detox habits support your body’s natural cleaning processes.
- 🎯 Build the Habit – Consistency is king. Use FocusForge to track your daily workout streak.
- 🧠 Never Miss a Workout – Set smart reminders with RoutineFlow AI to stay on track.
What to Expect (Realistic Timeline)
- Week 1-2: Muscle soreness (not joint pain). That’s normal. Your knees might still ache, but you’re building the foundation.
- Week 3-4: Stiffness starts to fade. Walking feels easier.
- Week 6-8: Noticeable improvement. Squatting, climbing, and carrying feel more stable.
Everyone is different. Be patient and consistent.
Support Your Knees from the Inside
Strengthening your muscles is the most important step. But you can also support your joint health with proper nutrition and targeted supplements.
🦵 Advanced Joint Support
If your knees feel creaky, stiff, or achy even after exercise, you may benefit from a supplement that targets joint lubrication and cartilage health. Advanced Joint Support contains glucosamine, chondroitin, and MSM—compounds that give your body the raw materials to maintain healthy joints.
🌿 Moringa for Inflammation
Moringa is a leafy green superfood packed with antioxidants and anti-inflammatory compounds. Chronic inflammation can make knee pain worse. Adding moringa to your daily routine—as a powder in smoothies or in capsules—may help calm that internal fire.
Track Your Progress with These Free Tools
Healing your knees is a journey. These tools help you stay consistent, track your wins, and build habits that last.
📊 Vitalis Dashboard – Track Your Fitness & Recovery
Log your daily exercises, track your pain levels, and see your progress over time. This dashboard puts everything in one place—steps, sleep, calories, and now, your knee rehab.
👉 Visit Your Vitalis Dashboard
🧠 RoutineFlow AI – Build Your Streak
Consistency is medicine. Use RoutineFlow AI to set a daily reminder for your knee exercises, track your streak, and celebrate your wins. Even 10 minutes a day adds up.
👉 Start Your Streak with RoutineFlow AI
🥗 Meal Planner + Calories – Fuel Your Recovery
What you eat directly affects inflammation and tissue repair. Use the Meal Planner to build anti-inflammatory meals that support joint health without the guesswork.
💧 Daily Detox Challenge – Reduce Inflammation
Gentle daily detox habits—like drinking more water, eating whole foods, and reducing processed sugar—lower your body’s inflammatory load. Less inflammation means happier knees.
👉 Join the Daily Detox Challenge
🎯 FocusForge – Build the Habit
Building a new exercise habit is hard. FocusForge helps you stay accountable, track your daily knee routine, and build the discipline to show up for yourself every day.
👉 Build Your Habit with FocusForge
My Final Advice
Knee pain is frustrating. It makes you feel older than you are. It steals activities you love. It whispers that you should just sit down and stop moving.
But here’s the truth: movement is the medicine. The right movement, done consistently, strengthens the muscles that protect your knees. It improves lubrication in the joint. It reduces stiffness. And it gives you back your confidence.
Start with one exercise today. Just one. Do it tomorrow too. Add a second next week.
Your knees have carried you this far. They want to keep carrying you. Give them the support they need.
This article contains affiliate links. If you purchase through these links, I may earn a commission at no extra cost to you. I only recommend products I genuinely believe in. This content is for informational purposes and is not medical advice. Always consult your healthcare provider before starting any new exercise or supplement routine.
Conclusion
The Incline Dumbbell Bench Press is the cornerstone of any serious upper chest-building program. By mastering your form, implementing the seven pro tips outlined above, and avoiding common mistakes, you can build a thicker, wider, and more impressive upper chest safely and effectively.
Remember to control the weight, squeeze at the top, and progressively overload over time. Your future self—with that powerful, chiseled upper chest—will thank you.